Physical Address
304 North Cardinal St.
Dorchester Center, MA 02124


If your Cuisinart coffee grinder is not working, chances are it is clogged with coffee grounds and not broken. Coffee grinders can get clogged up, which slows down the motor and prevents it from grinding properly.
Another possible issue could be a short in the electrical cord, a burnt-out thermal limiter, or a motor shaft that has stopped rotating. To fix a jammed coffee grinder, power down the machine, remove the grind chamber and hopper, and carefully wipe away any coffee dust or oil buildup.
If the issue persists, you may need to check the electrical components or contact Cuisinart customer support for further assistance.
If your Cuisinart coffee grinder is not working as expected, one possible cause could be that you are not properly following the instructions outlined in the owner’s manual. The owner’s manual provides important guidelines and steps for operating the coffee grinder effectively. It is essential to read and understand the manual before using the appliance to ensure its proper functioning.
Here are some common mistakes to avoid while operating your Cuisinart coffee grinder:
By avoiding these common mistakes and ensuring you follow the instructions provided in the owner’s manual, you can optimize the performance of your Cuisinart coffee grinder and enjoy consistently great coffee.
Removing the Lid
One of the common issues that coffee grinder users may face is a malfunctioning lid. Whether it’s due to a jammed mechanism or a simple error in handling, a non-functioning lid can hinder the grinding process. However, fear not! In this section, we will guide you through the steps to safely and effectively remove the lid of your Cuisinart coffee grinder.
| Potential Issue | Solution |
|---|---|
| The lid is stuck and won’t twist | Try gently tapping the lid to dislodge any debris or residue that may be causing the obstruction. Additionally, ensure that you are applying even pressure while twisting the lid. |
| The lid is damaged or broken | If you encounter a damaged or broken lid, it is advisable to contact the manufacturer for a replacement. Using a faulty lid can compromise the functionality and safety of the coffee grinder. |
By following these steps and addressing any potential issues that may arise during the lid removal process, you can ensure a smooth and hassle-free coffee grinding experience. As always, refer to the manufacturer’s instructions and guidelines for specific troubleshooting steps and safety precautions.
The grind adjustment knob is an essential feature of the Cuisinart coffee grinder that allows you to adjust the grind size according to your preference. Whether you prefer a fine grind for espresso or a coarser grind for a French press, the grind adjustment knob gives you the flexibility to achieve the perfect grind consistency.
When it comes to setting the grind adjustment knob on your Cuisinart coffee grinder, it’s important to understand how it works and the different options available.
The grind adjustment knob is typically located on the side or front of the grinder, depending on the model. It features a series of notches or numbers that indicate the grind size. By turning the knob clockwise or counterclockwise, you can select the desired grind size.
For a finer grind, such as for espresso, you would typically turn the knob towards the smaller numbers or notches. On the other hand, for a coarser grind, such as for a French press, turning the knob towards the larger numbers or notches would be ideal.
It’s important to note that the grind size may vary depending on the desired brewing method and personal preference. It can take some trial and error to find the perfect setting that suits your taste, so don’t be afraid to experiment with different grind sizes.
While the grind adjustment knob is designed to provide precise control over the grind size, there may be instances where it doesn’t function as expected. If you encounter any issues with the grind adjustment knob on your Cuisinart coffee grinder, try the following troubleshooting tips:
Remember, proper care and maintenance of your Cuisinart coffee grinder, including regular cleaning and routine maintenance, can help prevent issues with the grind adjustment knob and ensure optimal performance.
Regular cleaning of the upper burr in your Cuisinart coffee grinder is crucial for maintaining optimal performance and ensuring a great tasting cup of coffee every time. Over time, coffee oils and residue can build up on the burrs, affecting the grinder’s efficiency and the flavor of your coffee. The upper burr, in particular, is responsible for grinding the beans to the desired consistency, so keeping it clean is essential for achieving the perfect grind. By regularly cleaning the upper burr, you can prevent clogs, extend the lifespan of your grinder, and ensure consistent results with every use.
Cleaning the upper burr of your Cuisinart coffee grinder is a relatively simple process. Follow these steps to ensure a thorough and effective cleaning:
While the above step-by-step guide provides a general approach to cleaning the upper burr, there are a few alternative techniques you can try depending on your specific needs and preferences. Here are a few common cleaning techniques for the upper burr of your Cuisinart coffee grinder:
| Technique | Description |
|---|---|
| Using rice | Some coffee enthusiasts recommend grinding a small amount of uncooked rice in the grinder to help remove stubborn coffee oils and residue. |
| Vinegar soak | Soaking the upper burr in a solution of vinegar and water can help break down and dissolve tough build-ups. Be sure to rinse the burr thoroughly after soaking. |
| Baking soda paste | Mixing baking soda with water to create a paste and scrubbing the upper burr can be effective for removing stains and odor-causing compounds. |
Remember to always refer to the manufacturer’s instructions or consult the owner’s manual of your Cuisinart coffee grinder for specific cleaning recommendations. Regularly cleaning the upper burr and exploring different techniques can help keep your coffee grinder in top shape and ensure a consistently fantastic cup of coffee.
One of the most common issues coffee lovers face with their Cuisinart coffee grinder is when the grinder stops working. However, before you jump to the conclusion that your grinder is broken and needs to be replaced, it’s important to consider other factors that might be causing the problem. One such factor is clogged or dirty threading in the grinder.
When you use your Cuisinart coffee grinder regularly, coffee grounds can accumulate in the threading, causing the grinder to malfunction. This occurs when the coffee grounds stick to the threads, preventing the grinder from spinning properly. As a result, you may experience issues such as the grinder not turning on, producing inconsistent grind sizes, or even making strange noises. Therefore, it’s crucial to clean the threading of your coffee grinder regularly to prevent these problems.
Cleaning the threading on your Cuisinart coffee grinder is a relatively simple process, but it requires regular maintenance to ensure the grinder functions optimally. Follow these steps to effectively clean the threading and prevent potential problems:
By regularly cleaning the threading on your Cuisinart coffee grinder, you can prevent issues such as clogging, inconsistent grinding, and motor malfunctions. This simple maintenance routine will help to extend the lifespan of your coffee grinder and ensure a consistently perfect cup of coffee every time.

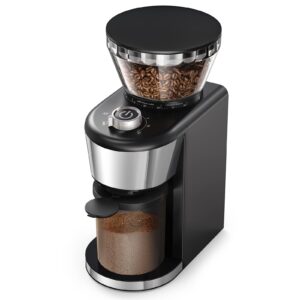
Credit: www.amazon.com
Your Cuisinart coffee grinder relies on the efficiency of its lower burr to provide you with consistently ground coffee. Over time, coffee grounds can accumulate in the lower burr, leading to clogging and a decrease in performance. To ensure that your coffee grinder continues to work at its best, regular cleaning of the lower burr is essential.
To prevent clogging and maintain the performance of your Cuisinart coffee grinder, follow these steps to clean the lower burr:
It is recommended to clean the lower burr on a regular basis to prevent clogging and ensure that your Cuisinart coffee grinder continues to deliver the perfect grind every time. By following these simple steps, you can extend the lifespan of your coffee grinder and enjoy freshly ground coffee without any issues.
Keeping the chute of your Cuisinart coffee grinder clean is essential for maintaining its functionality and quality performance. Over time, coffee grounds can accumulate in the chute, leading to clogs and hindered grinding. By following these proper cleaning techniques, you can ensure that your coffee grinder continues to work efficiently:
Prevention is key when it comes to maintaining the functionality of your Cuisinart coffee grinder. By following these tips, you can prevent clogs in the chute and ensure the smooth operation of your grinder:
By following these proper cleaning techniques and preventive measures, you can keep your Cuisinart coffee grinder in optimal working condition, ensuring a satisfying cup of coffee every time.
Cleaning your Cuisinart coffee grinder regularly is crucial for maintaining its performance and longevity. The recommended cleaning frequency for the coffee grinder is after every use. This ensures that any leftover coffee grounds or oils are removed, preventing them from building up and affecting the grinder’s functionality.
Proper maintenance is essential to keep your Cuisinart coffee grinder in optimal working condition. By following these tips, you can prolong the lifespan of your grinder and enjoy fresh and flavorful coffee for longer:
By adhering to these maintenance tips and cleaning the coffee grinder with the recommended frequency, you can ensure that your Cuisinart coffee grinder continues to deliver consistent and delicious coffee grounds for a long time.
Coffee grinders usually stop working because they are clogged with coffee grounds. It’s a common issue and can be easily fixed by cleaning the grinder.
A coffee grinder may not be grinding due to clogging with coffee grounds or other issues such as a shorted electrical cord or motor shaft not rotating. Cleaning the grinder and checking for any electrical issues can help fix the problem.
To fix a stuck coffee grinder, follow these steps: 1. Power down the machine and unplug it. 2. Remove the grind chamber and hopper. 3. Wipe away any coffee dust and oil buildup with a lint-free cloth. 4. Take out the outer burr, leaving the inner burr in place.
5. Clean the burrs and chute thoroughly. 6. Reassemble the grinder and try grinding again. Source: urnex. com/blog/things-to-know-if-your-coffee-grinder-is-jammed
There are a few possible reasons why your Cuisinart coffee maker might not be working. First, check if the water level is adequate and the water tube is not clogged with mineral buildup. Additionally, the heating element may be faulty.
Try troubleshooting these issues to get your coffee maker working again.
To troubleshoot your Cuisinart coffee grinder that’s not working, there are a few common issues to consider. Firstly, check if it’s clogged with coffee grounds, as this is often the culprit. Additionally, inspect the electrical cord for any damage, and ensure the motor shaft is rotating freely.
If your grinder still isn’t functioning, it may be a good idea to consult a professional or contact Cuisinart customer support for further assistance. Remember, regular cleaning and maintenance can help prevent future issues with your coffee grinder.